
Start a measurement in just a few steps
The purpose of this brief introduction is to show you how to commission the Expert Vibro devices quickly and easily. Please read this brief information before commissioning to avoid errors. For further information, you can access the online help by pressing F1 after installing the software.
Delivery contents
Please check the delivery contents directly upon receipt. This may vary depending on the device type and software purchased. You will find an overview in the table below. Please note that the ProfiSignal or ProfiSignal 20 measurement technology software is not included as standard and must be purchased separately. The DataService/Configurator configuration tool, on the other hand, is always included on the enclosed USB stick.
Please note that the Expert Vibro devices are not supplied with a power supply unit as standard! If you do not have a suitable power supply unit to hand, you can purchase a suitable plug-in power supply unit from us as an accessory.
| Expert Vibro device | X |
| USB stick incl. license pass and DataService/Configurator | X |
| ProfiSignal / ProfiSignal 20 software on the USB stick supplied | optional |
| Network cable (cross-over) | X |
| Power supply unit | optional |
| 3-pin connector plug for the power supply | X |
| Screwdriver | X |
Software installation
On the enclosed USB stick you will find the DataService/Configurator software associated with the device as well as the ProfiSignal / ProfiSignal 20 version you may have purchased, including the corresponding additional software functions (depending on the license). When installing the software, the license file created for you on the USB stick supplied is used. Please keep the USB stick in a safe place, as it contains your personalized license!
To install the software, insert the USB stick into a free USB port on your PC, open the newly displayed drive in Windows Explorer and double-click to start the "setup.exe" application. Please confirm the further installation steps with "OK" or "Next".
Please note that administrator rights are generally required to install the software and that the device is only connected to the PC after the software has been installed!
After installation, you will see the following icons on the desktop, depending on the license:


* You can also copy the contents of the installation medium to a network drive beforehand if you do not have access to a USB port.
Hardware connection
Voltage supply
To commission the device for the first time, please connect a 12 ... 24 VDC with at least 20 watts to the 3-pin plug provided. The Expert Vibro device is ready for operation when the selection menu and several display lines appear on the display and the top LED to the right of the display flashes green (heartbeat).

Please also ensure that the FE connection is connected to earth potential to ensure smooth operation of the device
Standalone connection
Connect the network cable between your PC and the device. The standard IP address of the device is 192.168.251.252. When connecting to the PC, please ensure that the PC has a network address that matches the above network range (e.g. 192.168.251.1).
Network connection
Please note that no other network device with the same IP address may be present in the network if the device is integrated directly into a network. The network parameters can be set on the device display for the LAN2 interface using the cogwheel symbol to suit your network.
If you need help with the steps described here or with further operation, the detailed online help is available to you at any time. You will find this when you start the DataService Configurator software in the menu under Help or by pressing the F1 key
Software start
DataService/Configurator
To configure channels or connect the devices to the PC, please start the DataService/Configurator on your desktop or from the Windows Start menu.
After starting the DataService/Configurator, you can search for the desired device in the overview via the menu item "Connect" → "Search Delphin devices".

In the overview, select your device by ticking "Add" and confirm with the "Add" button.

The device is now permanently logged on to the PC and the DataService accepts the data from the device.
The Channels tab is used to configure the individual devices and measuring points.

Click on the "+" sign to open the tree view of the device.

Channel configuration
The "I/O Channels" item now appears in the tree view. Click on the "+" sign in front to open the I/O channels of the device. Another click on the "+" sign in front of "Trigger Group #01" opens the analog inputs of trigger group 1.

Double-click on the respective channel (Analog Input #xx) to open the configuration dialog for the channel. Here you can set the name and sensor type, as well as other data relating to the sensor or the channel to be recorded. The configuration dialog also contains connection diagrams for all supported sensor types, which show you exactly which terminals the sensor cables should be connected to.
Now select the correct sensor type and connect the sensor to your Expert Vibro device as shown in the connection diagram.
IMPORTANT: Check the "Active" box at the top left so that the channel generates measured values!

In this example, the name "ACC x" is assigned to the channel. Click on "OK" to transfer your entries directly to the device and the new settings will be used for measurements from now on.
The subordinate channel "ACC x Track" (accessible via the "+" sign in front of the "ACC x" channel) then already displays the current measured value.

Double-click on "ACC x Track" to open a configuration dialog in which you can configure the device's internal signal processing chain (filter, sampling rate, etc.) for this channel. You can also enter a channel name (here: "a") and specify under "Scaling" how the sensor measured value (here a voltage in mV) is to be converted into the relevant physical measured variable (here acceleration).

The "ACC x a" channel now directly displays the current measured value for the physical measured variable of interest (here: acceleration).

Start online analysis with ProfiSignal
The ProfiSignal software is not included with your Expert Vibro device and must be purchased separately.
You can use the ProfiSignal software Go, Basic or Klicks to display the measured value curve, known as a trend, clearly in diagram form (e.g. y(x), y(t), logic diagram) and then analyze and export the measured values.
After you have started the ProfiSignal software (double-click on the corresponding icon), create a new online analysis by clicking on "File" → "New online analysis..." in the menu.
In the next step, select the oscilloscope diagram type and the channels to be displayed. The current measurement data is then displayed on the screen.

Using the toolbox below the diagram, you can navigate in the diagram, zoom or export the data. Using the analysis recorder, you can save measurement data in a file and open the files directly for further analysis.
As soon as the online analysis is open, you will receive further information on operation by pressing the F1 key.
The optional additional Vibro function supplements the existing ProfiSignal functions with special vibration measurement diagrams such as FFT, cascade, time signal, Bode, envelope curve, orbit and spectrogram
Start online analysis with ProfiSignal 20
The ProfiSignal 20 software is not included with your Expert Logger device and must be purchased separately.
To start ProfiSignal 20 Go or Basic, a user must always be created in DataService first. To do this, under the "User administration" tab, add → DataService ID xxxx "User" icon, right-click to add the desired user.
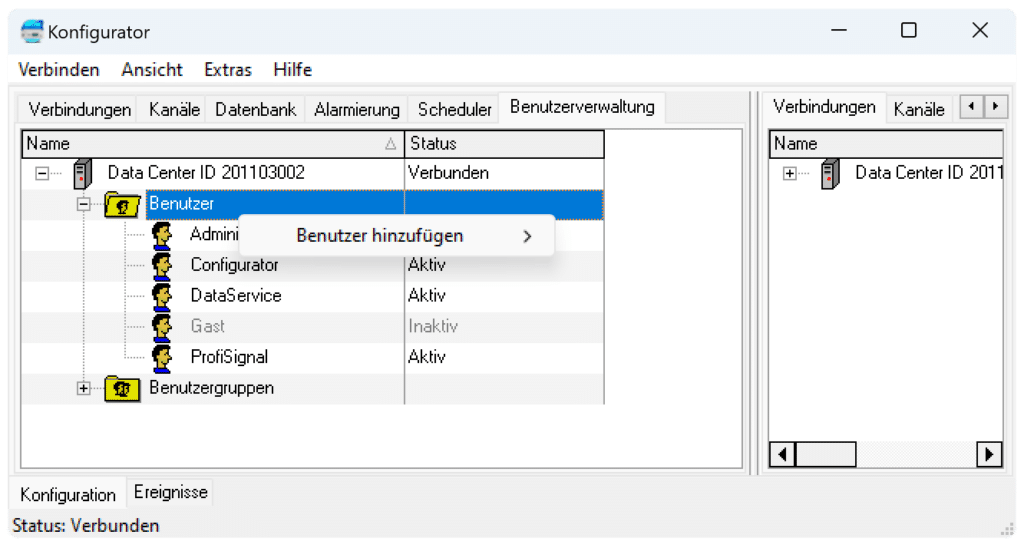
Start ProfiSignal 20 by double-clicking on the corresponding icon symbol. The Login window opens.
Enter the IP address or the host name of the ProfiSignal 20 server in the "Server" field. If the server is located on the same PC, simply enter "localhost".
Please enter the user name and the corresponding password that you have set up under "Set up user". Also select your preferred language. Then click on "Log in".
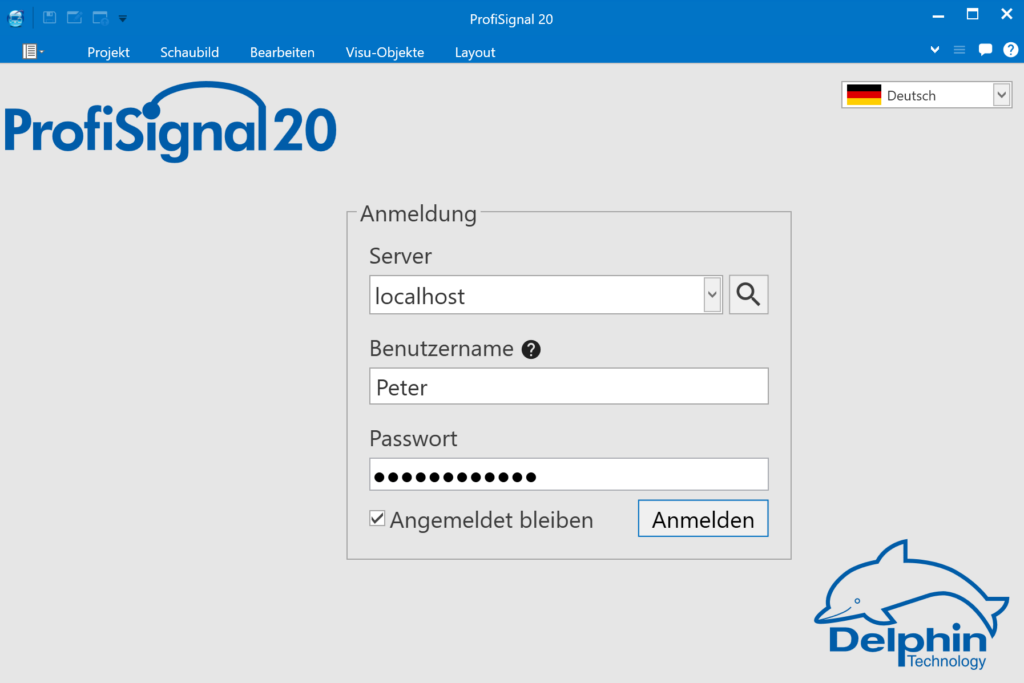
By confirming the login, you will land on the dashboard. The first time you log in, you will be asked to change your password.
In the top left-hand corner, create a new project via "New online analysis". Entering the project name is mandatory, the description is optional. You can also find all connected devices here.
Click on the arrow symbol to open the nested channels below. Select the prepared channel under "Configure channel" and drag & drop or double-click it into the right-hand menu.
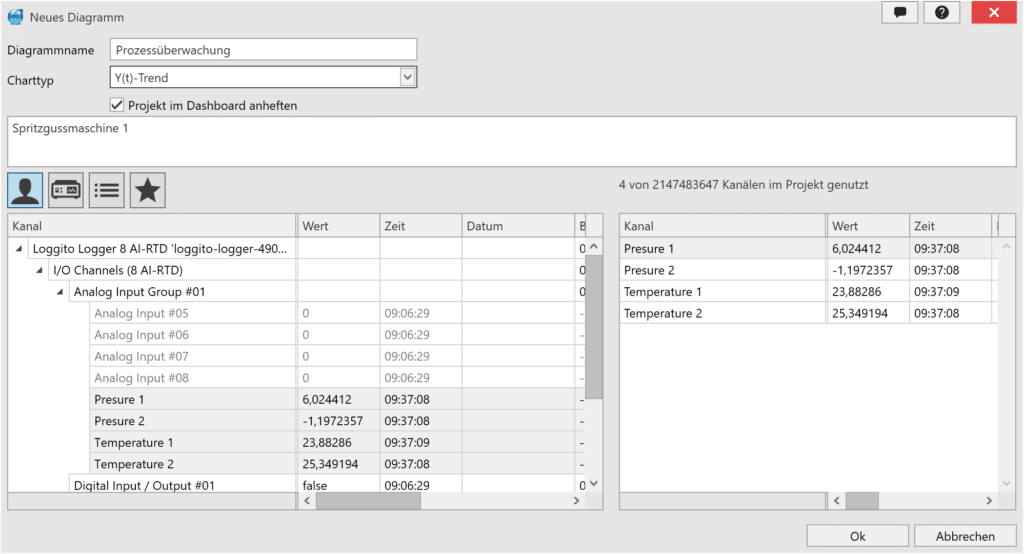
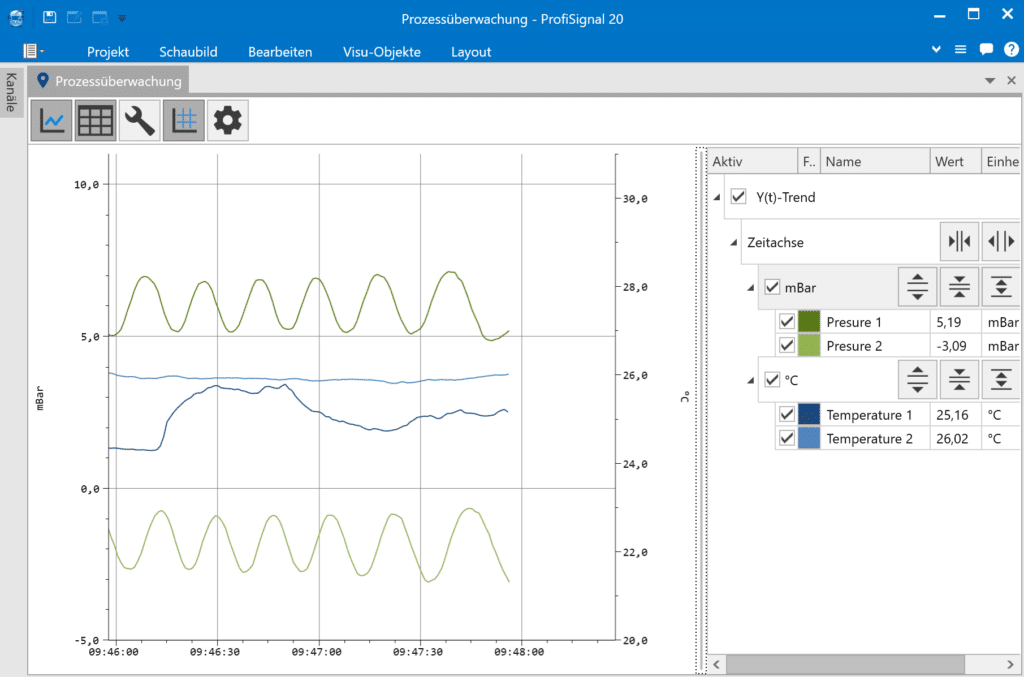
Click "Ok" to confirm your entry and access the generated online analysis. You can now make further settings to the trend using the toolbar at the bottom and the channel list on the right.
For ProfiSignal 20 you will find here a separate Quick Start Guide.
Find the video for the ProfiSignal 20 demo version here.